
Latest from the blog
11.29.2022
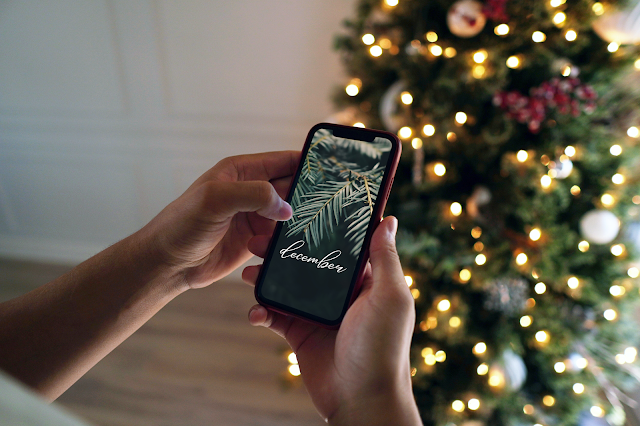
December wallpaper...

OMG.
December. Already.
Man, time flies. I know, I know...it's super cliché...but it's true.
The past few months I've been having a ton of fun designing digital prints, tags, cards, etc. for my Etsy shop. It's really so fun for me...and I'm loving it.
A few weeks ago, I decided to throw together a few phone wallpapers for December...grab 'em if you want 'em.

From your desktop: Click on the link above to access the Google Drive folder. Download the images you want to your computer, email them to yourself, open them on your phone, long press on the images and save to your phone. OR, just open the folder on your phone and save what you want, OR screenshot.
From your phone: Click on the link above to open the Google Drive folder. Tap on the image you want to download, tap the download button, then click "View." Long press on the image that pops up and click "Save to Photos."
ENJOY!

6.19.2020

Gearing up for summer fun...
Hey hey everyone!
Honestly, these came together in like 15 minutes.

All I did was take a sheet of patterned paper from the collection's 6x8 paper pad, trimmed it down just a bit, adhered it to a piece of white cardstock, and added my embellishments.


Man, what a crazy few months it's been.
And while things (at least in Illinois) are still very far from "normal," we're doing our best to make this summer fun & relaxing.
Next week, our state is scheduled to head into Phase 4 of our reopening plan, which means that gatherings of up to 50 people will be ok...and we plan on taking advantage of this asap.
I created these simple little invitations with Fancy Pants Designs Vitamin Sea Collection...and I can't wait to get them in the mail to all of our friends!
 |


I used Glue Dots Pop Up Dots to give each invitation a little dimension, and I love how they turned out!
I think this one is my favorite.
As soon as we have a definite plan, I'll just jot down the date & time on the back of each card and into the mail they'll go!
I gotta tell ya...I can't wait.
How about you?
What are your summer plans looking like?
Looking for more summer inspiration?
Check out these posts:
4.17.2020

From my TN...Delish | Fancy Pants Designs
Although I'm not sure that really means too much these days...😜
Today I'm sharing a traveler's notebook spread I created for Foundations Decor/Fancy Pants Designs...
I created this spread using the new Cherry On Top Collection and I am LOVING these colors!
 |
| A Cherry On Top 6x8 Paper Pad |
I started these pages by finding a piece of patterned paper that I thought worked well with my photo.
I love using these 6x8 paper pads in my notebook spreads, because I need to do very little trimming and the design motifs are smaller than they are on the 12x12 papers.
 |
| A Cherry On Top Ephemera |
I grabbed a few pieces of ephemera for this darling pack...
 |
| A Cherry On Top Tags |
 |
| A Cherry On Top Felt Pieces |
And then I finished up this side with a few felt letters and a few journaling strips.

**TIP: When placing pieces of ephemera or other embellishments close together, tuck pieces behind each other and/or layer them to add visual interest to your pages**
Check out this fantastic new collection at Foundations Decor and save 50% on Collection Kits today!

I hope you have a wonderful weekend!
Thanks so much for stopping by...
xoxo
Fancy Pants Designs A Cherry On Top 6x8 Paper Pad
Fancy Pants Designs A Cherry On Top Tags
Fancy Pants Designs A Cherry On Top Ephemera
Fancy Pants Designs A Cherry On Top Felt Pieces
Use my coupon code:
MAGGIEMASSEY
MAGGIEMASSEY
at Foundations Decor to get 10% off your order!
Looking for more scrapbooking inspiration?
Check out these posts:
Kate @ 10
Loved
Storyline Meets Jane Davenport
Hello Sunshine
PLEASE NOTE: Foundations Decor & Fancy Pants Designs sends me product several times each year to use in my projects. From time to time, my posts will include affiliate links.
Subscribe to:
Posts (Atom)


