
11.29.2022
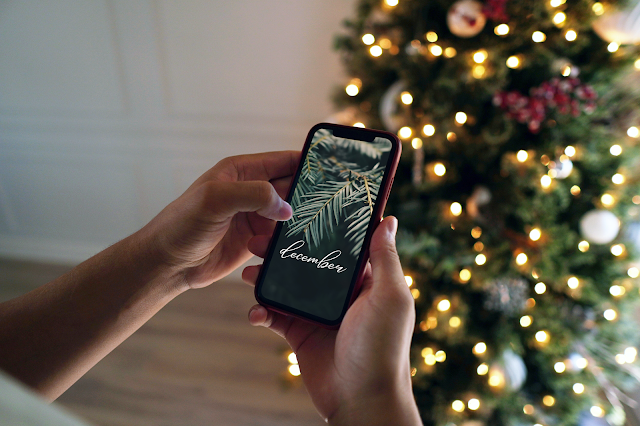
December wallpaper...

OMG.
December. Already.
Man, time flies. I know, I know...it's super cliché...but it's true.
The past few months I've been having a ton of fun designing digital prints, tags, cards, etc. for my Etsy shop. It's really so fun for me...and I'm loving it.
A few weeks ago, I decided to throw together a few phone wallpapers for December...grab 'em if you want 'em.

From your desktop: Click on the link above to access the Google Drive folder. Download the images you want to your computer, email them to yourself, open them on your phone, long press on the images and save to your phone. OR, just open the folder on your phone and save what you want, OR screenshot.
From your phone: Click on the link above to open the Google Drive folder. Tap on the image you want to download, tap the download button, then click "View." Long press on the image that pops up and click "Save to Photos."
ENJOY!

6.19.2020

Gearing up for summer fun...
Hey hey everyone!
Honestly, these came together in like 15 minutes.

All I did was take a sheet of patterned paper from the collection's 6x8 paper pad, trimmed it down just a bit, adhered it to a piece of white cardstock, and added my embellishments.


Man, what a crazy few months it's been.
And while things (at least in Illinois) are still very far from "normal," we're doing our best to make this summer fun & relaxing.
Next week, our state is scheduled to head into Phase 4 of our reopening plan, which means that gatherings of up to 50 people will be ok...and we plan on taking advantage of this asap.
I created these simple little invitations with Fancy Pants Designs Vitamin Sea Collection...and I can't wait to get them in the mail to all of our friends!
 |


I used Glue Dots Pop Up Dots to give each invitation a little dimension, and I love how they turned out!
I think this one is my favorite.
As soon as we have a definite plan, I'll just jot down the date & time on the back of each card and into the mail they'll go!
I gotta tell ya...I can't wait.
How about you?
What are your summer plans looking like?
Looking for more summer inspiration?
Check out these posts:
4.17.2020

From my TN...Delish | Fancy Pants Designs
Although I'm not sure that really means too much these days...😜
Today I'm sharing a traveler's notebook spread I created for Foundations Decor/Fancy Pants Designs...
I created this spread using the new Cherry On Top Collection and I am LOVING these colors!
 |
| A Cherry On Top 6x8 Paper Pad |
I started these pages by finding a piece of patterned paper that I thought worked well with my photo.
I love using these 6x8 paper pads in my notebook spreads, because I need to do very little trimming and the design motifs are smaller than they are on the 12x12 papers.
 |
| A Cherry On Top Ephemera |
I grabbed a few pieces of ephemera for this darling pack...
 |
| A Cherry On Top Tags |
 |
| A Cherry On Top Felt Pieces |
And then I finished up this side with a few felt letters and a few journaling strips.

**TIP: When placing pieces of ephemera or other embellishments close together, tuck pieces behind each other and/or layer them to add visual interest to your pages**
Check out this fantastic new collection at Foundations Decor and save 50% on Collection Kits today!

I hope you have a wonderful weekend!
Thanks so much for stopping by...
xoxo
Fancy Pants Designs A Cherry On Top 6x8 Paper Pad
Fancy Pants Designs A Cherry On Top Tags
Fancy Pants Designs A Cherry On Top Ephemera
Fancy Pants Designs A Cherry On Top Felt Pieces
Use my coupon code:
MAGGIEMASSEY
MAGGIEMASSEY
at Foundations Decor to get 10% off your order!
Looking for more scrapbooking inspiration?
Check out these posts:
Kate @ 10
Loved
Storyline Meets Jane Davenport
Hello Sunshine
PLEASE NOTE: Foundations Decor & Fancy Pants Designs sends me product several times each year to use in my projects. From time to time, my posts will include affiliate links.
4.14.2020

Summer Layout | Fancy Pants Designs
Today I'm sharing a layout I created for Foundations Decor/Fancy Pants Designs...
This layout was SO FUN to put together...and it definitely has me longing for warm summer days spent with friends...

One of my favorite things about this layout is the background...is that weird?
Probably.
This is the paper I used...

I took another sheet of this same design...cut it down a bit...and used the "B" side as the next layer of my background.
Then I cut down a sheet a white cardstock to make the final layer of my background.
I added my photo and then began layering ephemera & tags.
I played around with things quite a bit before I decided on a design I really love...


I added a few journaling strips & some puffy dots, and then I stamped the PERFECT ink splotches exactly where I wanted them.
**TIP: Use adhesive dots to adhere layers to your page.
This will give your embellishments depth and will add visual interest**

I love all of the layers in this page...and I hope I've inspired you to use some fun layering on your next page.
Thank you so much for stopping by!
xoxo
SUPPLIES:
Fancy Pants Designs Vitamin Sea Collection Kit
Fancy Pants Designs Vitamin Sea Ephemera
Fancy Pants Designs Vitamin Sea Puffy Dots
Fancy Pants Designs Vitamin Sea Tags
Fancy Pants Designs Vitamin Sea Chipboard
Kerri Bradford: Inked
Use my coupon code:
MAGGIEMASSEY
MAGGIEMASSEY
at Foundations Decor to get 10% off your order!
Looking for more scrapbooking inspiration?
Check out these posts:
Scrapping A Large Photo | Storyline
Working On A Grid | Storyline
You Are Timeless
Brothers
PLEASE NOTE: Foundations Decor & Fancy Pants Designs sends me product several times each year to use in my projects. From time to time, my posts will include affiliate links.
4.13.2020

A look through my latest TN | Day 5
Hello, hello everyone!
Happy Monday!
How was your Easter?
Ours was fine...super laid-back...online church, card games, driving practice for Grayson, Easter dinner & movie night.
We're going through a cold snap here in Chicago, so, unfortunately, the next week staying home may be a little more difficult...ugh.
BUT, that's OK...we're one day closer to normal, right?
How about a look at Day 5 in my "think HAPPY" TN?
This is another super simple spread that came together quickly, and without too many supplies.
To create this design, I printed out a single photo, and cut it down the middle. I matted each side of the photo on a cut of white cardstock, and then adhered them across the middle of my notebook.
I typed up my journaling on some white cardstock and then cut and added each strip to the right-hand side of my spread.

Next, I cut some strips of patterned paper (just slightly over 1/4" wide) and added them to the top and bottom of each side of my notebook.
Finally, I added a few more little embellishments and called it a day!
This basic layout can be customized simply by...
*Changing the orientation of the photo or paper strips
*Using washi tape instead of paper to embellish the edges of your notebook
*Handwriting your journaling
*Keeping your photo on one side of your spread, and moving all of the journaling & embellishments to the other side
*Adding patterned paper to your notebook pages to create a background for your photo
I hope you have a wonderful week!
Come on back on Wednesday for Day 6!
See more about these pages HERE on Heidi's blog
Disclosure: This post may contain affiliate links, which means I may receive a commission if you click a link and purchase something that I have recommended. Don't worry, clicking these links won't cost you any extra money. Please check out my disclosure policy for more details. Thank you for your support!
4.08.2020

A look through my latest TN | Day 4
Day 4!
Here's today's spread...
This is probably one of my most simple spreads in the notebook...but it's also one of my favorites...and I made it with just a single photo and a set of stamps (and a sticker...😊...oh, and a little piece of patterned paper...that's it...).

I layered & overlapped the stamps and my journaling a bit to make them look a little more natural and utilitarian. I love the look of all of the old-timey notebooks and journals...and a little less deliberate look really makes me think of those older books.
Thank you so much for taking a little time out of your day today to stop by!
In case you missed them, you can see my first 3 spreads from this notebook HERE, HERE, & HERE
I hope you all have a wonderful weekend...😘
SUPPLIES:
Heidi Swapp Journal Studio Inserts - Happy
Heidi Swapp Color Fresh Stamps
Heidi Swapp Color Fresh Memory Planner Stamps
Heidi Swapp Memory Planner Magnetic Date Stamp
Heidi Swapp Journal Studio Sticker Book
See more about these pages HERE on Heidi's blog
Want more stamping inspiration?
Check these out...
Florida... (via Kerri Bradford)
SPLASH (via Elle's Studio Blog)
Weekend Getaway (via Kerri Bradford)
Disclosure: This post may contain affiliate links, which means I may receive a commission if you click a link and purchase something that I have recommended. Don't worry, clicking these links won't cost you any extra money. Please check out my disclosure policy for more details. Thank you for your support!
Here's today's spread...
This is probably one of my most simple spreads in the notebook...but it's also one of my favorites...and I made it with just a single photo and a set of stamps (and a sticker...😊...oh, and a little piece of patterned paper...that's it...).
I layered & overlapped the stamps and my journaling a bit to make them look a little more natural and utilitarian. I love the look of all of the old-timey notebooks and journals...and a little less deliberate look really makes me think of those older books.
Thank you so much for taking a little time out of your day today to stop by!
In case you missed them, you can see my first 3 spreads from this notebook HERE, HERE, & HERE
I hope you all have a wonderful weekend...😘
SUPPLIES:
Heidi Swapp Journal Studio Inserts - Happy
Heidi Swapp Color Fresh Stamps
Heidi Swapp Color Fresh Memory Planner Stamps
Heidi Swapp Memory Planner Magnetic Date Stamp
Heidi Swapp Journal Studio Sticker Book
See more about these pages HERE on Heidi's blog
Want more stamping inspiration?
Check these out...
Florida... (via Kerri Bradford)
SPLASH (via Elle's Studio Blog)
Weekend Getaway (via Kerri Bradford)
Disclosure: This post may contain affiliate links, which means I may receive a commission if you click a link and purchase something that I have recommended. Don't worry, clicking these links won't cost you any extra money. Please check out my disclosure policy for more details. Thank you for your support!
4.07.2020

April stamp release | Kerri Bradford
Happy Wednesday, everyone!
I know this is coming in a bit late...but I'm still trying to catch up after taking my little getting-used-to-this-whole-stay-at-home-order break...
Today I'm sharing a little TN spread I created using the new April stamps from Kerri Bradford...
I knew right away it would be perfect to use with these new stamps...and I love the way this spread turned out!

To start this project, I cut out two pieces of patterned paper to fit inside my notebook. I do this when I don't want to work on the plain white pages that are standard in the books or when the patterned paper the book is created with isn't my favorite...😏.

I adhered my photo to my left-hand page, and then I ran it through my typewriter to add my journaling.
Then I adhered the entire page to the paper in my notebook.

I grabbed some inks that complemented the colors in my photos and then I got to work on the right-hand side of my spread.
I started by stamping the little bunny bum, and then I just worked up & down the page using stamp designs that fit with my spread.
Finally, I adhered the right-hand page to the page in my notebook.

The design for this page is really simple...but it's one that I use over and over, because it can be changed up with different colors and stamps.
Thank you so much for stopping by...😘
I hope I've inspired you to maybe grab an old photo and document it!
Have any questions about my work or how I've done anything on my pages?
Contact me at maggie@midwesterngirldiy.com ... I'd love to hear from you!
4.06.2020

A look through my latest TN | Day 3
Hey hey everyone!
Welcome back!
I took a few weeks off to try to wrap my head around this whole pandemic thing, but now I'm back!
The kids started virtual learning this morning, so I figured now was as good a time as any to get back on the horse myself...
Before my little hiatus, I had started sharing each of the spreads in my latest TN...you can find those posts HERE and HERE.
And here's Day 3!
For this spread I used several photos...each sized about 3"x4".
I added two photos to the left-hand side, and then used a strip of washi to fill out the remaining space on the page.
On the right-hand side, I added one photo to the top and some journaling and a couple of embellishments to the bottom.
To change up this basic layout, why not try...
*Switching up the arrangement of the basic elements. Move the photos & embellishments/journaling around the give you a new design
*Using page-filling photos or journaling spots OR use several smaller-sized photos
*Filling each page with photos and tucking your journaling in behind. Try writing your story on tags that can be pulled out from behind your photos. If you do this, make sure to adhere your photos to your page on only the sides and bottom...forming a little pocket to hold your journaling tag.
Stay safe & healthy! I'll be back Wednesday with spread 4...
SUPPLIES:
Heidi Swapp Journal Studio Inserts - Happy
Heidi Swapp Journal Studio Washi Tape
Heidi Swapp Journal Studio Sticker Book
See more about these pages HERE on Heidi's blog
Want more notebook inspiration?
Kinsley's First Easter (via Kerri Bradford)
Journal Studio 19 for 2019 (via Heidi Swapp)
DIY TN notebooks (via Heidi Swapp)
Disclosure: This post may contain affiliate links, which means I may receive a commission if you click a link and purchase something that I have recommended. Don't worry, clicking these links won't cost you any extra money. Please check out my disclosure policy for more details. Thank you for your support!
3.11.2020

A look through my latest TN | Day 2
Here we are at Day 2 of our look through my latest TN!
Let's get right to it...
These pages, like the first ones, document Christmas 2018, but this spread could definitely be used for any occasion. There's nothing too overtly "holiday-ish" about it.
Here I added my photo to the left-hand side (you'll soon realize that a full-size photo is my favorite format for my notebooks).

One the opposite side, I started by layering some stickers...first the circle, then the "love," and then the heart.
**NOTE: Overlapping stickers or ephemera pieces like this adds dimension and visual interest. But remember, if you're going to type on your labels/stickers, make sure you do it before you add them to your spread. It's next to impossible to get a notebook to run through your typewrite easily.**
Next, I typed up some journaling strips and then added them to the page.
Finally, I added a strip of washi tape to each side of my spread to make the layout cohesive.
This clean, simple layout came together so easily and can be repeated over & over.
Try following these steps to change things up:
*Use patterned paper to create your own embellishments
*Draw pencil lines directly on your pages to keep things straight, and then add your journaling using your handwriting
*Add washi tape to the top & bottom of your spread - across your pages
Have any questions about how I create my spreads?
Don't hesitate to contact me at maggie@midwesterngirldiy.com!
Thank you so much for stopping by...I'll be back Monday with spread 3!
SUPPLIES:
Heidi Swapp Journal Studio Inserts - Happy
Heidi Swapp Color Fresh Sticker Book
Heidi Swapp Journal Studio Sticker Book
Heidi Swapp Color Fresh Washi Tape
We R Memory Keepers Typecast Typewriter
See more about these pages HERE on Heidi's blog
Want more notebook inspiration?
See some here:
Hawthorne: DIY Travelers Notebook
This is Magic (via Kerri Bradford)
Five New Stamp Sets (via Kerri Bradford)
Disclosure: This post may contain affiliate links, which means I may receive a commission if you click a link and purchase something that I have recommended. Don't worry, clicking these links won't cost you any extra money. Please check out my disclosure policy for more details. Thank you for your support!
3.09.2020

A Look Through my latest TN | Day 1
There are few things more satisfying than finishing something you started what seems like forever ago.
I started this notebook in January 2019, and I just added the last spread...yayayay!
I thought it might be fun to take a little more detailed look through it over the next few weeks!
Just so you know...there is no rhyme or reason to this book.
The spreads are in no particular order, chronological or otherwise.
Sometimes I just opened up the book and added my spread to whatever blank pages were available.
And that's OK by me.
It's the fact that I actually got the event/moments/photos documented that's important.
Here's we go...

Now this first spread is obviously from Christmastime and was for a blog post for Heidi Swapp entitled Journal Studio | 5 Ways to Document in Your Journal.
I added a photo of our tree to the right-hand side, and then I added the word "magical" to the bottom. A little pink star sticker sits on top of the tree.

On the left-hand side, I covered the blank notebook page with a piece of patterned paper.
**NOTE: I try to choose my patterned paper so as not to compete with my photo. If my photo has a lot of color/pattern, I try to choose a paper that is more subdued. For this spread, I chose a more colorful paper to offset the basic black/gold of my photo.**
Next, I cut out a little rectangle of vellum, and adhered it to my paper on both sides and the bottom to create a little pocket.
I used a piece of baker's twine to string together two tags...and on the bottom tag I added my journaling.
There are so many ways you could change this layout up to create your spread...
*Reverse your photo and patterned paper
*Use patterned paper or even another photo to create your "pocket"
*Replace the large photo with 2 or 3 smaller ones
One of the things I love most about scrapbooking is that just by changing up one or two things, you can make your spreads/layouts look entirely different from one another.

And that's spread 1!
I'm so excited to share this notebook with you...
Hopefully you'll be inspired to work in your own notebook, or to try something new!
Have any questions about how I create my spreads?
Don't hesitate to contact me at maggie@midwesterngirldiy.com!
Thank you so much for stopping by...come on back Wednesday to see more!
SUPPLIES:
Heidi Swapp Journal Studio Inserts - Happy
Heidi Swapp Color Fresh 12 x 12 paper pad
Heidi Swapp Color Fresh Sticker Book
Heidi Swapp Journal Studio Ephemera
Heidi Swapp Journal Studio Sticker Book
Vellum
See more about these pages HERE on Heidi's blog
Want more notebook inspiration?
See some here:
Hawthorne: DIY Travelers Notebook
This is Magic (via Kerri Bradford)
Five New Stamp Sets (via Kerri Bradford)
Disclosure: This post may contain affiliate links, which means I may receive a commission if you click a link and purchase something that I have recommended. Don't worry, clicking these links won't cost you any extra money. Please check out my disclosure policy for more details. Thank you for your support!
2.24.2020

Emojis Stamp Set & Dies | Technique Tuesday
Don't you just love emojis?
They convey so much meaning & emotion, and they have really become part of how we communicate.
😊😍😋
Those are some of my favorites.
And now you can add those fantastic little symbols to your documenting!
These darling new Emojis Stamp Set & Emojis Crafting Dies from Technique Tuesday are the perfect additions to your collection!
 |
| Emojis Stamp Set |
 |
| Emojis Crafting Dies |
Wanna see how I've used them on a couple of projects?
These three little designs say everything you need to know about this spread...

And the "heart eyes" design is the perfect way to express how I feel about that photo...


Here's how I used the bundled set (both the emoji stamps & the dies) to create a card and some coordinating confetti...

This was so quick & easy to make...I just chose my stamp designs and my ink colors, and got to work.

Then I typed out a quick sentiment and adhered it to the card.

Next came the fun part...creating all of the confetti to put inside my card.
I decided to keep my dies all connected so that I didn't have a bunch of small little emoji dies running around getting lost...so I did have to sort out the happy faces from the die cuts...but that was no big deal.
Love both the stamps & the dies and feel you can't live without them?
Save money when you bundle them!
 |
| BUNDLED: Emojis Stamp Set with Matching Dies |
And if you really love all of the amazing Technique Tuesday stamps and dies and you just can't wait to get your hands on more, they even have a monthly autoship program that saves you a ton!
Members enjoy 25% off their Memory Keepers Studio stamps, 15% off select products, free shipping on add-on orders, and more.
Check out all of the Memory Keepers Studio Stamps HERE
and see all of the Fresh Cut Studio Craft Dies HERE
I'd love to see what you're creating...tag me @maggiemassey on IG!
Looking for more cardmaking inspiration?
Check these out:
Tabbed Birthday Cards
Semi-Handmade Cards
Magnolia Jane Cards
Kate's Birthday Invitations
or search "cards" here on my blog...
xoxo
PLEASE NOTE: Technique Tuesday sent me these stamps & dies free of charge to use on my projects. All opinions are my own. From time to time, my posts will include affiliate links.
2.18.2020

From my TN - The Grand Canyon
I'm sitting here in my computer room...freezing my a$$ off...in the middle of a Chicagoland winter (which, in all fairness, has been incredibly mild - but still...winter)...looking at this photo of my daughter and her friends at The Grand Canyon last July (yes...Arizona in July)...and wishing desperately for some heat and sunshine.
I was putting this TN spread together the other day, and I was just so inspired by the colors in the photograph...the tans & browns, teals & yellows.
They are just so warm and desert-y you know?
They're really making me look forward to summer's long, hot days.
I decided to accent those wonderful colors using these ephemera pieces from the Fancy Pants Designs Good Ol' Days collection...
 |
|
|
I printed my photo at a width of 6" and then cut it to allow it to fit across the fold in my book.
I find that I sometimes struggle with creating notebook layouts that differ from one another because of the notebook's smaller size.
But, changing up my photo size definitely helps to keep things interesting.

The horizontal phrase die-cuts, placed vertically alongside (and slightly overlapping) my photo also add to the visual interest of the spread.
And my favorite part of the whole thing?
The little rubber globe from the Good Ol' Days Silicone Shapes set.

Seriously adorable, right?
I don't normally like to add a lot of bulk to my notebooks, but I just couldn't resist this time.
 |
| Silicone Shapes |
A few lines of journaling...documenting the who, where & when...and this spread was done!

Just a few more months until summer...I can't wait...
Looking for more Traveler's Notebook inspiration?
Take a look at these posts:
A Day at the Theatre
Hawthorne | DIY Traveler's Notebook
2018ex | A Journey in Memory Keeping
And use my coupon code:
MAGGIEMASSEY
MAGGIEMASSEY
at Foundations Decor to get 10% off your order!
xoxo
PLEASE NOTE: Foundations Decor & Fancy Pants Designs sends me product several times each year to use in my projects. From time to time, my posts will include affiliate links.
Disclosure: This post may contain affiliate links, which means I may receive a commission if you click a link and purchase something that I have recommended. Don't worry, clicking these links won't cost you any extra money. Please check out my disclosure policy for more details. Thank you for your support!
Subscribe to:
Posts (Atom)


