posts in category craft trends
2.01.2016

Back to Basics...the Heidi Swapp Minc
Every once in a while it's good to just get back to basics...don't you think?
So today I'm going to do just that.
Today we're going to be looking at the Minc.™ What exactly is it? And how does it work?
But first let me give you a little background...
Last year (2015), at the CHA Mega Show in Anaheim, CA, Heidi Swapp introduced her Minc.™ Foil Applicator...
...and it was the undisputed star of the show.
Since then, Heidi (and a number of other brands, too!) has introduced scores of products designed to work with the Minc.™ It's popularity continues to grow and grow. In fact, coming in March, a whole new line of products designed to work with the Minc.™ will be introduced - and they're sure to change the crafting world forever...more on those later.
The Minc.™ , which stands for Metallic Incorporated, is a machine that uses heat and pressure to apply foil to any design that has been printed with toner - i.e. on a laser printer. That's it in a nutshell.

See the designs above (just a few of the hundreds of pre-printed designs available for use with the Minc.™)? They have been printed on a laser printer. So, everywhere you see black you're seeing toner. That means that when we run them through a Minc.™...

...along with some specially-designed toner-reactive foil (available in a huge variety of colors)...we'll get that gorgeous foil shine - everywhere there once was just plain black.

This is how we do it...
Each machine comes with a transfer-folder. Essentially a 24"x12" piece of acetate folded in half (to 12"x12") to create a carrier for our designs and foil.

To apply the foil to the designs, you need to lay your pieces inside this transfer-folder - giving them ample space so that they don't touch each other.

Next, you lay a piece of foil, color-(foil) side-up over the pieces...making sure to cover each piece completely.

The machine comes with a number of heat settings (0 - for no heat, all the way to 5 - for use with wood veneer). "3" works with the vast majority of designs and is what most crafters will use.
You turn the machine on and press the big gold button in the middle of the heat settings until you reach "3." When the machine is ready and the light turns green (usually after about 30 seconds), you place the folded side of your transfer folder into the machine until you feel the rollers grab the folder. Then you let go and let the machine do all the work.

As soon as your folder makes it through the Minc.™, you can remove the excess foil (no cool-down or drying time is needed!) and you're done!
Your once black and white designs are now covered in the most beautiful color and shine!
This machine truly takes paper-crafting to a whole new level for both beginner and advanced crafters. There are tons of videos online demonstrating this amazing machine and all of its capabilities...here's one from Heidi herself to get you just a bit more familiar with the Minc.™:
Heidi's Minc. ™ introduction video
And here's one I did at the 2015 show!
Maggie's video - yayayay!
To see all of the videos and techniques featuring this genius machine, simply Google (or search on Pinterest or YouTube "Heidi Swapp Minc videos" or "Minc videos" or "Minc techniques"...there is a ton of inspiration out there!
Thank you so much for stopping by! And happy foiling!
SUPPLIES: Heidi Swapp Minc Foil Applicator, Heidi Swapp Foil, Heidi Swapp Minc Chipboard

3.20.2014

new spring trends + a fun & easy tutorial! #craftmonthlove with Jo-Ann Fabric and Craft Stores!
DISCLOSURE: The following post is part of the Jo-Ann Fabric and Craft Stores® National Craft Month Campaign. I received compensation from Jo-Ann to purchase the products I needed to create this project; however, I was given the liberty to choose the project I wanted to create. All opinions are my own.
So, not only does March mark the start of spring, it is also National Craft Month! And Jo-Ann Fabric and Craft Stores has the coolest spring crafting website that is sure to inspire you! And guess what else? Jo-Ann is making your spring crafting even easier with a coupon for $5 off your purchase of $25 or more! So awesome!
I was chosen to be part of this fantastic campaign for Jo-Ann and I'm so excited to share my project with you! So grab your coupon, hit your local Jo-Ann, warm up that sewing machine and let's make some Reversible Market Totes!
I was chosen to be part of this fantastic campaign for Jo-Ann and I'm so excited to share my project with you! So grab your coupon, hit your local Jo-Ann, warm up that sewing machine and let's make some Reversible Market Totes!
What are these fantastic new trends you ask? Geometric patterns are HUGE this spring...like, HUGE! So are florals, radiant orchid (Pantone's color of the year!), and nautical-themed projects.
I decided to take on all of these trends with my project! Well, almost all of them. Pantone may dig purple, but I just can't. I just. can't. Soooo, I focused on the other three...
I already knew that I wanted to make some new Market Totes...you can NEVER have too many... so all I had to do was pick out my materials. I headed out on my weekly trip to my local Jo-Ann and made a bee-line for the fabric department.
It took me all of about 10 minutes to choose the patterns I wanted...
I also browsed around the scrapbooking department for a while and found something that would be perfect for my totes...
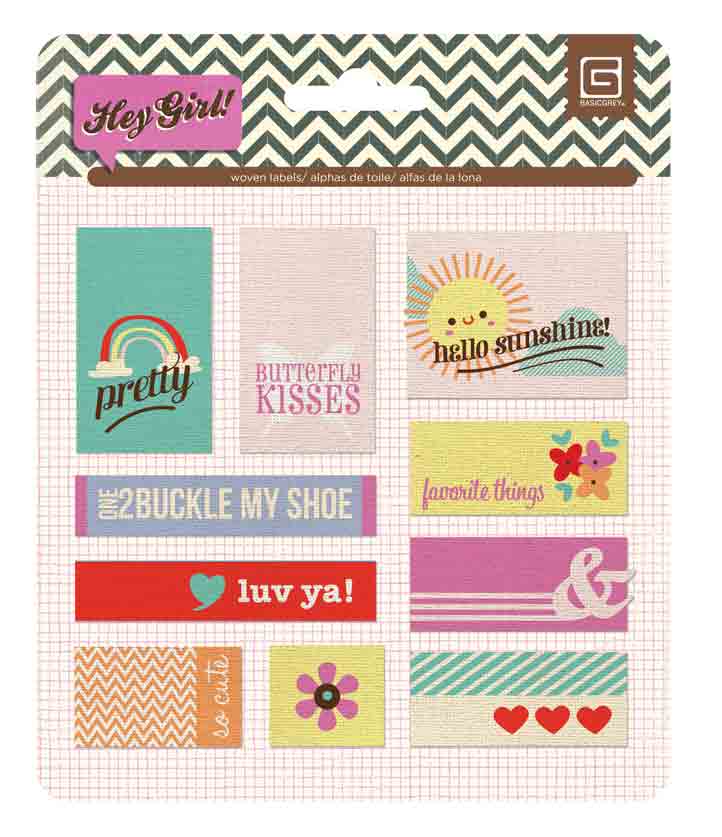
Adorable, right?!?!?!
I love the fact that you can make these totes reversible...more bang for your buck! Plus, I love the eclectic look of two completely different patterns together...
I decided to make 2 bags with each pattern combination...1 yard of fabric makes 1 entire bag (if you use the same fabric for both the lining and main fabric), so I bought 1 yard of each of 4 patterns and was able to get 4 totes. LOVE!
This was my first combination...geometric + floral...I fell in LOVE with this chevron...those colors! They SCREAM spring! And I'm seeing a top in this very same pattern in my future...

See the cutie-pie woven label I picked up?

Such darling little flowers...


I thought this tote would look so great on our trips to the beach!

And this red/white ticking is fantastic...not necessarily a "nautical" pattern, but I think it's perfect...

I thought this one would look cute with a little scarf...I mean really...so cute!

So how would you like to make one of these totes?
I knew you would! Just click the link below to be taken to the downloadable pdf. If you can sew a straight line, you can make a reversible tote! OH! Wouldn't these be fun little gifts for all of your mom-friends for Mother's Day?

Have fun & HAPPY SPRING!
And thank you so much, Jo-Ann for giving me the opportunity to participate!
Subscribe to:
Posts (Atom)