
posts in category packaging
9.25.2012

Fun Halloween Candy Packaging with Lifestyle Crafts
As the weather gets cooler and cooler here in the Midwest, I start thinking more and more about the wonderful few months to come. Weekends full of leaf raking (which I adore!), pumpkin farm visiting, hot apple cider, and Halloween! I've already started doing some crafting...and I can't wait to share today's project with you!
Remember last week when I showed you a glimpse of the projects I've been making with my new dies from the Lifestyle Crafts Tricks & Treats & Cornucopia collections? Awesome, right?
I used the doily die from "Cornucopia" for this fun little craft...
Here is the doily die...

And here is what you get after your run it through your die-cutter (any old die-cutter will do! That's what's awesome about the Lifestyle Crafts dies!)...

And are you ready for the tutorial?
*Cut 2 doilies for each pouch you would like to make (I cut mine from Canvas Corp Tissue Stock)
*Glue your doily to another piece of paper (again, I used Canvas Corp Tissue Stock...this time in white)
*Cut your paper around your doily
*Put two of your doily/paper combos together and sew around the circle almost all the way around...back stitch at the beginning and end of your stitches
*Fill your pouch with candy and sew closed
That's it!
Easy, right?

I love the way these little candy-filled pouches look...can't you just see a whole bunch of them sitting in a bowl waiting for little hands to reach in and grab? Or set all over your Halloween party table, doing double-duty as a decoration and snack?
Love these.
And don't forget...any order you place with Lifestyle Crafts (including those with sale items!) is eligible for a 20% discount with the promo code MIDWESTERN - so awesome!!!

So what do you think? Have you starting crafting/decorating for Halloween yet?
Remember last week when I showed you a glimpse of the projects I've been making with my new dies from the Lifestyle Crafts Tricks & Treats & Cornucopia collections? Awesome, right?
I used the doily die from "Cornucopia" for this fun little craft...
Here is the doily die...
And here is what you get after your run it through your die-cutter (any old die-cutter will do! That's what's awesome about the Lifestyle Crafts dies!)...

And are you ready for the tutorial?
*Cut 2 doilies for each pouch you would like to make (I cut mine from Canvas Corp Tissue Stock)
*Glue your doily to another piece of paper (again, I used Canvas Corp Tissue Stock...this time in white)
*Cut your paper around your doily
*Put two of your doily/paper combos together and sew around the circle almost all the way around...back stitch at the beginning and end of your stitches
*Fill your pouch with candy and sew closed
That's it!
Easy, right?
I love the way these little candy-filled pouches look...can't you just see a whole bunch of them sitting in a bowl waiting for little hands to reach in and grab? Or set all over your Halloween party table, doing double-duty as a decoration and snack?
Love these.
And don't forget...any order you place with Lifestyle Crafts (including those with sale items!) is eligible for a 20% discount with the promo code MIDWESTERN - so awesome!!!
So what do you think? Have you starting crafting/decorating for Halloween yet?
*DISCLOSURE: Lifestyle Crafts has generously sent me samples of some of their dies to use and review. All of the opinions I express on my blog are mine.

8.06.2012

quick & easy house guest gift...part 1
Every year my sisters-in-law and I meet near my house for 2 days of fun with all of our kids. We usually hit a water park one day and then either a children's museum or the zoo for the other day. We meet kind of near my house so my kids and I come home for the night, while the other girls and their kids spend the night in a hotel.
This year, however, my sisters-in-law and the cousins will be staying with us overnight (yay!). We rarely see each other, so I'm really looking forward to hanging out with them on Wednesday night...
Now, whenever we have guests, I like to give them a little something to let them know how grateful we are for them...and this time is no different.
Last week, Bath & Body Works had a huge sale on soap, so I loaded up...I bought 14. Yes, I said 14. If you follow me on Instagram, you may have seen this photo...
So...guess who's getting soap as a part of their gift this week?
Here are the two soaps I started with...

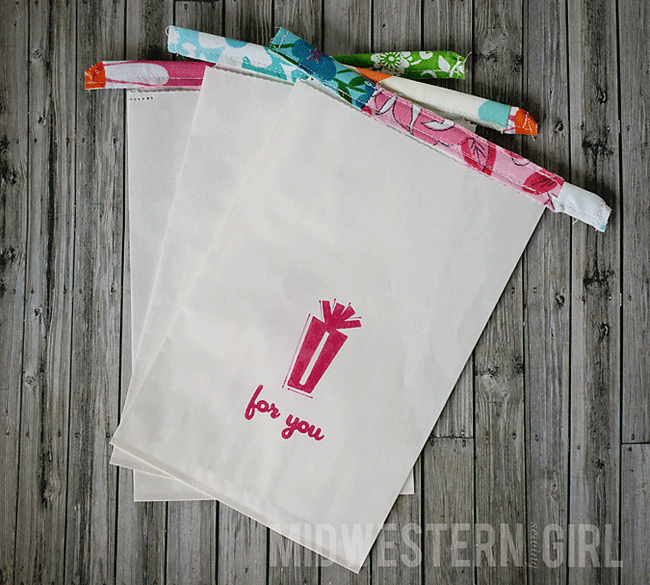
I just set them in a little paper treat bag (from Pick Your Plum), designed and cut a little tag with my Silhouette, and I was done...

Nothing spectacular, but hopefully the girls will like 'em...

Tomorrow I will share the recipe for the amazing cookies I made for the second part of their house guest gifts...yum.
--------------------------------------------------------------------------------------------------------------------
Hope you all had a great weekend!
Only 2 weeks before my kids head back to school! Woo hoo! I will miss them, but, I gotta tell ya, I won't miss the summer messes or fighting...uh uh...not at all...
This year, however, my sisters-in-law and the cousins will be staying with us overnight (yay!). We rarely see each other, so I'm really looking forward to hanging out with them on Wednesday night...
Now, whenever we have guests, I like to give them a little something to let them know how grateful we are for them...and this time is no different.
Last week, Bath & Body Works had a huge sale on soap, so I loaded up...I bought 14. Yes, I said 14. If you follow me on Instagram, you may have seen this photo...

So...guess who's getting soap as a part of their gift this week?
Here are the two soaps I started with...
I just set them in a little paper treat bag (from Pick Your Plum), designed and cut a little tag with my Silhouette, and I was done...
Nothing spectacular, but hopefully the girls will like 'em...
Tomorrow I will share the recipe for the amazing cookies I made for the second part of their house guest gifts...yum.
--------------------------------------------------------------------------------------------------------------------
Hope you all had a great weekend!
Only 2 weeks before my kids head back to school! Woo hoo! I will miss them, but, I gotta tell ya, I won't miss the summer messes or fighting...uh uh...not at all...
5.29.2012

berry basket gift packaging...with @LifestyleCrafts
Berry baskets are everywhere right now...and I LOVE them. So when I saw that Lifestyle Crafts was offering a berry container die to use with pretty much any die cutter, I knew I had to have one.
And with this time of year offering so many opportunities to give gifts (for teachers, classmates, etc.), I knew just what I would use my little berry baskets for.
Isn't that just the cutest little container? I absolutely adore it. And the die comes with the little tag (in two sizes!) to add to your container (or, frankly, to any of your crafts!).

The metal "rectangle" and the two little metal tags up there are the dies...you just need to cut two of the rectangles in order to make the berry container...then you fold and glue the pieces together and you're done!

I used the Lifestyle Crafts Letterpress System to add the word "HELLO" to my tags. I was going to write "thank you" on them (they are going to the kids' classroom aides), but I made them with the hope that maybe the aides would use them again. Then I added some stationery & recipe cards, stuffed in some shredded paper & wrapped everything up in a little plastic bag.


I can see these little baskets made with scores of different patterned papers, and used for just about everything...from storage to packaging to scrapbooking (how fantastic would these be used as a container to hold mini-albums?). I'm pretty darn sure it's not the last time you'll see them here...
What would you use these little baskets for? I'd love to hear your ideas!
As always, you can save 20% on every single purchase you make at Lifestyle Crafts with the promo code "MIDWESTERN"...so cool.
And with this time of year offering so many opportunities to give gifts (for teachers, classmates, etc.), I knew just what I would use my little berry baskets for.
Isn't that just the cutest little container? I absolutely adore it. And the die comes with the little tag (in two sizes!) to add to your container (or, frankly, to any of your crafts!).
The metal "rectangle" and the two little metal tags up there are the dies...you just need to cut two of the rectangles in order to make the berry container...then you fold and glue the pieces together and you're done!
I used the Lifestyle Crafts Letterpress System to add the word "HELLO" to my tags. I was going to write "thank you" on them (they are going to the kids' classroom aides), but I made them with the hope that maybe the aides would use them again. Then I added some stationery & recipe cards, stuffed in some shredded paper & wrapped everything up in a little plastic bag.
I used Canvas Corp Flute paper for my baskets...the corrugated look adds to the basket feel, don't ya think?
I can see these little baskets made with scores of different patterned papers, and used for just about everything...from storage to packaging to scrapbooking (how fantastic would these be used as a container to hold mini-albums?). I'm pretty darn sure it's not the last time you'll see them here...
What would you use these little baskets for? I'd love to hear your ideas!
As always, you can save 20% on every single purchase you make at Lifestyle Crafts with the promo code "MIDWESTERN"...so cool.
4.11.2012

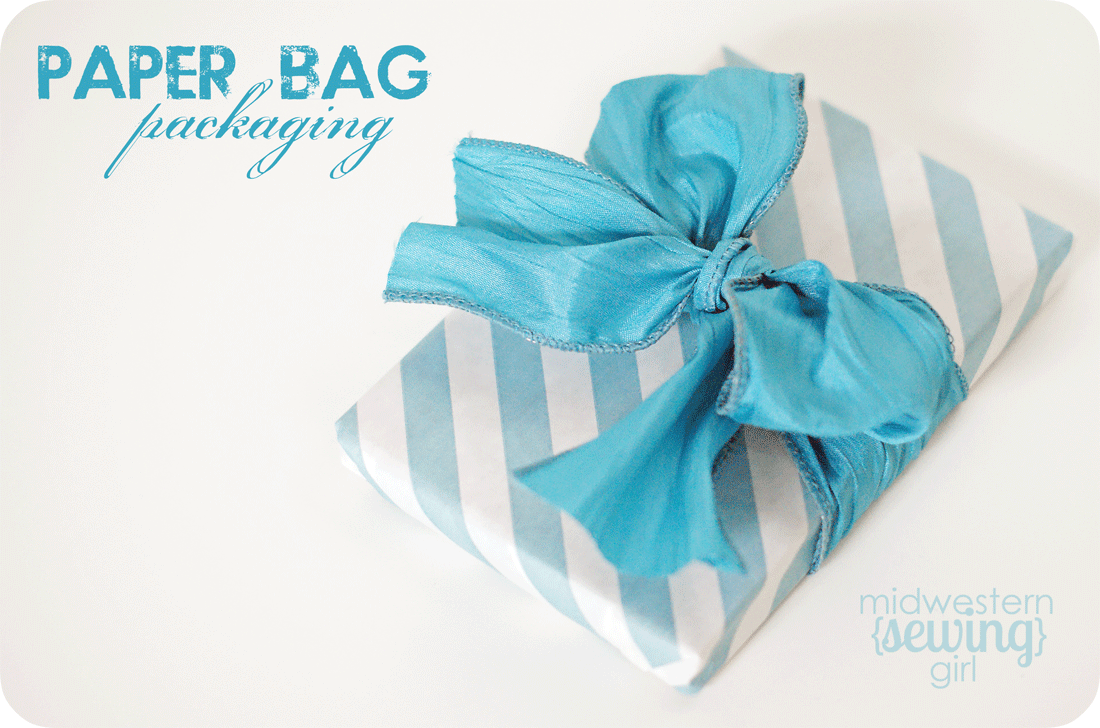
a new twist for your treat bags...
Yesterday I shared the invitations I made for Kate's 9th birthday party...today I'm going to show you the treat bags she will be giving to her guests...
And these aren't just your average old treat bags...these bags have a little twist...
Do you see what it is?
Well, we'll get to that in just a second...
First I took some plain white paper bags (5x7) and used my Lifestyle Crafts Epic 6 and Letterpress Splendor plates to print the little gift and the words "for you" on the bags. I learned yesterday that it really should NOT take as long as it did for the ink to dry on my invitations. I most definitely used too much ink...I will know better for next time.
Then I took a pink marker and just added a little depth to the gift graphic...

Now here's the twist...
I was looking for a way to close the bags...simple folding is great, stickers are fine, staples are OK, but I wanted something a little different. Suddenly, it occurred to me that a Chips Ahoy bag is perfect! What better way to close a bag than to fold it and make sure it stays folded with those little tab thingies? Now, I know what you're thinking...airplane bags fold the same way...well...yes, they do. But I prefer to compare my bag to one that holds chocolate chip cookies thankyouverymuch.
I found some fabric scraps that were about an inch or so wide and about 10" long (you can use wide ribbon for this, too!)...

I folded the fabric in half width-wise and sewed down the length of the piece...

Then I cut the fabric piece just long enough to extend past both sides of the bag by about 1 1/2"...
Next I grabbed some floral wire and my wire cutter...

I cut the wire to fit inside the strip of folded fabric...with just a little room between the end of the wire and the end of the fabric...about 1/4"...

Then I sewed the ends of the fabric closed...you can see by the photos that I didn't worry too much about having nice crisp seams or super-accurate lines of stitching...and I didn't bother finishing the ends of the fabric...I just left them raw...

After I had finished making my little wire sleeve, I decided where I wanted to place it on my bag. It was so handy that the bag came with a little lip at the top...I was able to sew the sleeve on here without worrying about sewing the bag closed...
If your bags don't have this lip, just cut one side of the bag down a little to create one...
Sew your sleeve onto your bag...


And make sure you can still open it...
Here's a view of the back...after the sleeve has been sewn on...

And guess what? You're done!
You now have some super-cool treat-bags...with a twist!

And here they are all twisted up...


You can choose to fold the bags so that the wires fold toward the front, too...I chose to fold them backwards on my bags...
So what do you think? Think you would add this to your next set of treat bags?
DISCLOSURE: Lifestyle Crafts sent me a Letterpress Combo Kit and the printing plates and ink used for the invitations and treat bags. All opinions stated are my own...100%. I think this system is wicked-awesome and I love how the letterpress printing turned out. It's really classy looking...totally different from printing from your home computer and it's super-easy to do.
Here's where I'm linking up this week...
And these aren't just your average old treat bags...these bags have a little twist...
Do you see what it is?
Well, we'll get to that in just a second...
First I took some plain white paper bags (5x7) and used my Lifestyle Crafts Epic 6 and Letterpress Splendor plates to print the little gift and the words "for you" on the bags. I learned yesterday that it really should NOT take as long as it did for the ink to dry on my invitations. I most definitely used too much ink...I will know better for next time.
{***from now through April 15, the Splendor printing plates are 25% off! PLUS, if you use the code MIDWESTERN at checkout, you can an ADDITIONAL 20% off...what the what? awesome!***}
Then I took a pink marker and just added a little depth to the gift graphic...
Now here's the twist...
I was looking for a way to close the bags...simple folding is great, stickers are fine, staples are OK, but I wanted something a little different. Suddenly, it occurred to me that a Chips Ahoy bag is perfect! What better way to close a bag than to fold it and make sure it stays folded with those little tab thingies? Now, I know what you're thinking...airplane bags fold the same way...well...yes, they do. But I prefer to compare my bag to one that holds chocolate chip cookies thankyouverymuch.
I found some fabric scraps that were about an inch or so wide and about 10" long (you can use wide ribbon for this, too!)...

I folded the fabric in half width-wise and sewed down the length of the piece...
Then I cut the fabric piece just long enough to extend past both sides of the bag by about 1 1/2"...
Next I grabbed some floral wire and my wire cutter...
I cut the wire to fit inside the strip of folded fabric...with just a little room between the end of the wire and the end of the fabric...about 1/4"...
Then I sewed the ends of the fabric closed...you can see by the photos that I didn't worry too much about having nice crisp seams or super-accurate lines of stitching...and I didn't bother finishing the ends of the fabric...I just left them raw...
After I had finished making my little wire sleeve, I decided where I wanted to place it on my bag. It was so handy that the bag came with a little lip at the top...I was able to sew the sleeve on here without worrying about sewing the bag closed...
If your bags don't have this lip, just cut one side of the bag down a little to create one...
Sew your sleeve onto your bag...
And make sure you can still open it...
Here's a view of the back...after the sleeve has been sewn on...
And guess what? You're done!
You now have some super-cool treat-bags...with a twist!
And here they are all twisted up...
You can choose to fold the bags so that the wires fold toward the front, too...I chose to fold them backwards on my bags...
So what do you think? Think you would add this to your next set of treat bags?
DISCLOSURE: Lifestyle Crafts sent me a Letterpress Combo Kit and the printing plates and ink used for the invitations and treat bags. All opinions stated are my own...100%. I think this system is wicked-awesome and I love how the letterpress printing turned out. It's really classy looking...totally different from printing from your home computer and it's super-easy to do.
Here's where I'm linking up this week...
9.14.2011

...paper bag packaging...with Whisker Graphics
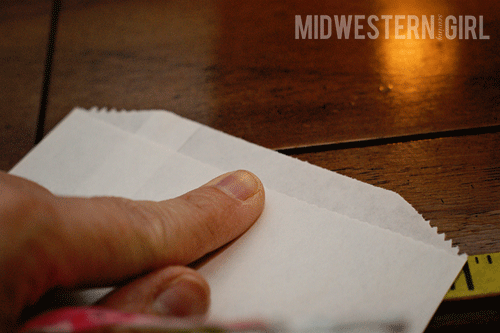
Today I wanted to share something I threw together with one of the Whisker Graphics Bigger Bitty Bags...these bags are 6.25" x 9.25", so they're large enough to wrap small packages...
![]()


Just grab a bag...

Open it up...and then iron it flat (carefully...remember this is paper...you don't want it to burn...)

Find what you want to wrap...

And do it up...

Easy, inexpensive & there's no cutting huge rolls of wrapping paper involved...
And don't forget about the wonderful Whisker Graphics giveaway going on right now!
9.12.2011

Whisker Graphics {Giveaway} NOW CLOSED

A couple of weeks ago I was fortunate enough to win the Whisker Graphics giveaway at Lil' Luna (Kristyn is amazing, btw)...and man oh man was I excited! Ever since I first heard about Whisker Graphics on Whipperberry (Heather...also amazing) I knew I had to get my hands on these products...they're just so pretty...
So, I used up my gift certificate (in about 3 seconds) and my products came with lightning speed...and, I have to tell you, this company is awesome. Not only do they offer beautiful packaging, paper goods & printables, they also carry a line of the most amazing baker's twine you've ever seen. In addition to sporting the most beautiful colors, Whisker Graphics' divine twine™ is the thickest, most durable twine I've ever come in contact with...

Chevron bags...yep. Awesome.

Check out this wonderful monthly calendar...ON FLASHCARDS! OK, seriously adorable...

And this scooter stationery? Yes, please...
Whisker Graphics is generously awarding a $25.00 gift certificate to one of my lucky readers!
And I only had to beg a little...
Here's how to enter: (4 entries per person...please leave a separate comment for each & include your email address if it's not already linked to your profile - thank you!)
1. Please be a follower of Midwestern {Sewing} Girl...
2. Visit Whisker Graphics and come back here to let me know how you would spend your gift...
3. Check out the Whisker Graphics blog and become a follower...
4. "Like" Whisker Graphics on Facebook & leave them a note telling them I sent you...
That's it!
This giveaway will be open until Sunday September 18, 11:59 pm central, and the winner will be announced Monday, September 19.
GOOD LUCK!
Subscribe to:
Posts (Atom)


